Friday, October 15, 2010

What's With The Airbrush Makeup?


I get asked alllll the time "What is airbrush makeup?" and "What's the big deal?" I get it, I mean it's not your every day makeup routine (unless you really are that high maintenance). There are some cheaper and smaller contraptions out there, but the one pictured on the left is what I use. For someone who has never seen, heard or experienced airbrush makeup, it looks and sounds like the thing could give your car an oil change, but it's anything but that!

The results that airbrush makeup can give you are fantastic! Especially for a bride. For one, it provides full coverage that lasts all day long through all the tears and sweat that come with being a bride, and it is completely weightless. It feels like you have nothing on! Really! It's great for people who don't normally wear face makeup (ie. foundation, powder, etc.). Instead of being pressed into the pores of the skin and causing break outs and redness, it lays on top of the skin, which is what gives it that flawless, poreless look. The spray dot pattern it leaves is great for HD photos and video because it falls in a sheer dispersed manner that is nondetectable on camera.   
Airbrush

Sponge

Brush
 The reason the airbrush makeup looks different on HD is because regular standard definition TVs display about 330 lines of resolution, while Hi-Def shows 720 to 1080 which is why makeup artists are challenged more in this arena with this added pressure to really even out skin tones and make it look like your not wearing a mask. The makeup shows up even more clearly than before, but because the airbrush makeup lays on the skin in a similar manner that the camera reads the face, it is less traceable and even-toned. 
Standard Definition

Hi Definition

The airbrush makeup that I use with my clients is water based and is 100% vegan making it a PETA-approved company (Obsessive Compulsive Cosmetics http://www.occmakeup.com/)! Which means it has not been tested on animals, and doesn't use any animal-deriven ingredients making it safe for all skin types (oily, sensitive, acne prone, dry, etc.). It also doesn't contain silicone or DHA (a chemical that changes the skins color and is a common ingredient in sunless tanners and harmful to inhale).


You can see every pore! Too much matte makeup
It is not overly opaque and does not leave the skin looking matte, which on HD can expose wrinkles and lines more (I used Adam Lambert as an example left, but he shouldn't be wearing that much makeup ANYWAYS), but instead gives a wonderful balance between dewy and matte, which is what natural skin should look like, and helps aid in the anti-aging department as well. And who wouldn't want that??...It can also be used to cover up or fade out scars, tattoos, tan lines, veins, bruises, and uneven pigmentation any where on the body.

There is no real need for touch-ups giving it another reason to be used for weddings or all-day events. The only downside to airbrush makeup is that even though it can stand up to tears and sweat, it is not 100% waterproof.  So when you do cry, if you let the tears fall down your cheek, it will leave a line which is very difficult to touchup or fix. Imagine laying down some fresh concrete and then someone runs over it with their bike (the nerve... but it happens). You can't just re-touch the parts that were run over. You have to re-apply another coat to the whole area so that it's even. That's why when you have airbrush makeup, it is important to carry a touch up kit of powder with you or catch the tear before it falls down your cheek and dab, dab, dab.: ) Q-tips are great for attacking those tears ducts to make sure nothing falls onto your under eye area or cheeks.

Tuesday, October 12, 2010

How To Prepare for Your Trial Run

Most brides who are considering hiring someone to do their hair and/or makeup for their wedding will have a trial run before the big day.  This appointment with your artist/stylist is highly recommended and is not just something to take lightly.  This appointment is a preview of what to expect from the artist/stylist’s work and how they work with you.  Everyone has different skin, hair, and opinions on what looks good.  So it is a great opportunity to get on the same page with your artist/stylist.
It is also a great chance to get to know one another and feel comfortable working with this vendor on your big day.  Some brides choose to schedule their trial runs months in advance, while others procrastinate and do it weeks or even days before the wedding.  Timing is not a problem when it comes to trial runs, it’s finding someone who will be available on your wedding day that is usually the situation.  That is why it is also highly recommended that you don’t wait until the last minute (i.e. 2-3 weeks before your wedding or sooner) to find an artist/stylist, especially in the high wedding seasons (between May-October).
Usually your photographer will know of artists or stylists in your area, because they usually work with them on projects and at past weddings. Also, talk with your married girlfriends and see who they might have used for their wedding day.  Chances are you won’t have problems finding a good vendor, but like I said, when you wait until the last minute, it becomes difficult to find someone who is actually available that day.
So now that you have found someone who is available on your wedding day, how can you prepare for your appointment with her/him? Well the first thing to do, is have a picture in your head or a physical picture from a magazine or online of how you want to look for your wedding day.  This not only helps the artist/stylist visulize what you are going for, but trust me, it will help you in the end too because the last thing you need is to try to explain what you want and then have it come out completely different.  Like I mentioned earlier, everyone has different opinions of what looks good. So it is strongly recommended that you have a photo of what you want. Having 2-3 photos is great, but if you can only find one, that works too. Any thing helps!
A good day to do the trial run is actually on the morning of your bridal shower or bacheloretter party.  This way not only are you all dolled up for your event, you can get the feedback from your friends/family about your look. This isn’t completely necessary, obviously, but it is not a bad idea.
Next, you will want to take super duper good care of your skin weeks ahead or even months ahead of your wedding.  Not only is this obviously beneficial to you in general, but makeup looks sooo much better and more flawless when you have great looking, healthy skin. Especially if you are getting airbrush makeup. It will look like you have porcleain skin!
When you show up to your appointment, it is nice if you have clean skin. I know some of you out there can’t walk out in public without at least some makeup on, but just throw on those sunglasses and put on some lipgloss and call it a day. Trust me, it cuts down on lots of prep time. This “rule” applies to the wedding day as well. Not just for you, but your bridal party as well. You will be on a tight schedule that day so cutting out the little steps that can actually be avoided is ideal.
Also, showing up with wet or damp hair is a no no.  Unless you just want a blow out, then fine, but for anything else, especially if you are going to be curling your hair, wet hair is not good. For one, it takes unnecessary time to sit there and dry it all completely, and then most importantly, the curls will not hold up well.  So wash your hair the night before please.
Another tip to prepare for your trial run is to wear a white top and bring a camera if you aren’t bringing someone with you or going to see them later on that day.  White will reflect light onto your face and will allow the artist to get a concept of how your makeup will look when you have your dress on.  It will bring the colors out on your face. The camera is so you can take a picture of how you look and send it to your girlfriends and/or your mom for their opinion.  Their opinion is almost always going to be “It looks good, but maybe do this….blah blah blah.” Remember, this is your wedding, and you’re going to do what you like at the end of the day. It’s fine to take their critisim, but don’t let it get to you.  More often then not, the moms always want the daughters to tone it down, but I can tell you now that in photos, especially the professional photos, your makeup is going to get washed out and if you go too natural it won’t show up in the photos.  There is a fine line between too much and too little.  It is ultimately up to you to decide where that fine line starts, but overrall your makeup artist should be able to accomplish this if they are experienced enough. Building up the intensity as you go along is easier than starting out harsh and going back the other direction.  So talk with your artist and explain and show them how you normally wear your makeup and this will allow the artist to determine where that fine line between too much and too little starts with you. It will be different for everyone so make sure, again, to be clear about your expectations and bring a photo.
I understand that some brides have no idea what they want to do or what looks good on them, but saying “Do whatever you want” is actually the last thing artists/stylists want to hear from a bride or even a bridesmaid on the wedding day or trial run.  It is never a good idea to put beauty in the hands of someone that you have never met before, trust me. I can’t say it enough, everyone has a different opinion of what looks good. Yes, artists and stylists are trained and experienced enough to know how to apply makeup and what might look good for you, but honestly, I have had way too many people say “do whatever you want,” and then end up not liking it.  I’ve seen it way too many times, and other people that I know in the industry have had this experience as well.  So whatever you do, just bring a photo.
And last, but not least, be honest. If you don’t like something, say it.  You aren’t going to hurt the artist’s/stylist’s feelings. This is the whole point of the trial run; to make sure you get it right the first time around.  It is your chance to play with styles and colors and see what looks good on you. However, there is a “trick” to this being honest thing…. You have to say something right away. Don’t wait until she/he is all done and then tell them to fix it, because more often then not, they won’t be able to after it’s already said and done. Once that hairspray is in, it’s in for good and there’s no back stepping.  So keep glancing in that mirror and give feedback as you go along. If after you leave from your appointment, things start to “fall apart” or don’t hold up, let your artist/stylist know so that they can make the necessary adjustments on the day of (ie. your hair starts to fall down, your eyelashes were coming off, etc.).
So what have we learned? Let’s break it down:
1. Bring a picture of how you want your hair and/or makeup done.
2. Bring a camera or schedule your trial run on the morning of your shower/bachelorette party.
3. Wear white.
4. Don’t come with makeup on or wet hair.
5. Don’t say “Do whatever you want” to your artist/stylist.
6.  Be honest about what you don’t like (right away).
 

Eyeshadows for Your Eye Color

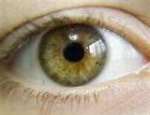
                                                    Brown/Hazel Eyes- Pretty much any color will look good but the best way to intensify your eye color are by using purples, golds, bronzes, silvers, dark greens, peaches, and mauves.


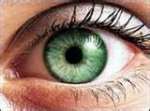
Green Eyes- Dark browns, golds, coppers, turquoise, dark purple, and light greens,(stay away from blues and blue undertones)


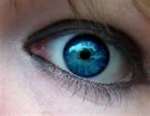
Blue Eyes- Greys, chocolates, peaches, coppers, and golds

Lashes 101

 If you know me well, you know that I’m in love with lashes! Big, full, eyelashes are my favorite beauty essential hence the reason for my business logo being none other than, of course, LASHES! I started wearing fake eyelashes about 4 years ago, and as soon as I saw the difference they made in my look, I was officially hooked, but was always told that I don’t really need them anyways. I became literally obsessed with having long, full lashes no matter where I was going and they soon became part of my daily makeup regimen. Whether it was the office or a night out on the town, I had them on. This carried on for about a year or so, and then I realized I don’t really need them, and, that habit soon became a nuisance after accidentally ripping most of my eyelashes out. I had no choice but to wear them every day for about a month (more about that later).
I constantly hear from women when applying their makeup, that they just can’t seem to put those pesky, but much needed and much wanted, fake eyelashes on. They really make such a huge difference in your look and enhance your eyes tremendously (what girl doesn’t want that?!). They show up better in pictures and add that extra pop of glamour. It can be very tricky though, and it is sometimes difficult for even me, a makeup artist that has used lashes for years now, to put them on myself. So I decided to help some of you out by giving you some pointers on how to put them on, which brands are my favorite, which mascaras will help you achieve that youthful, gorgeous look without the fake lashes, and other options for those long, full lashes!  

How to Apply Fake Eyelashes
The first thing you are going to want to do, is apply all of your eyeshadow first. Once you are done with that, you will want to curl your lashes as much as you can especially if you have very straight lashes. Now get those lashes ready! When taking the lashes out of their plastic containers, it is good if you can grab some tweezers to do the job, but if you don’t have any handy, just be careful when removing them as sometimes you can end up kinking the lashes and once you do that, they’re ruined. Grab an end of the lash and peel it off slowly and gently from the plastic container. Now you will want to “measure” the lash to see if you will need to cut off some of the length. We don’t all have big eyes, so this is a very important step in the process. Putting an unmeasured strip on your eyes is going to be very, very uncomfortable if they don’t fit your eye. Look in the mirror, tilt your head and look downwards into the mirror. This will lower your eyelids but will allow you to see what you are doing. Now grab the lash and set it on your lash line to see how much you will need to cut off. If none of it is hanging over the length of you eye, then you’re good to go. If you do need to cut some off, grab some small scissors and cut the inner corner (the smaller lashes on the end) off. You don’t want to cut the outer corner (longer lashes) off as that is the whole point of getting the lashes in the first place (duh!)! Now with some lash glue apply a generous, but thin amount on a smooth surface (ie. Counter, back of you hand, the plastic container the lashes came in, etc.), and create a line that is about 2 inches long. Dip the lashes in the lash glue line you just made. Blow on it a little bit to speed up the drying process as you don’t want to put them on your eyes just yet. When the glue starts to fade into black or “disappear” you will want to put it on now. Close one eye and look in the mirror. Lay the lashes on top of your lashes and try to get the strip as close to the lash line as possible. Begin your focus with the outer corner of the eye and lying the lashes across your whole eye, making sure the end are connecting well as these will be the first things to come off if they’re applied correctly. The glue should be tackier in texture at this point, making it easier to maneuver the lashes. Keeping your eye closed, push up on the ends to make sure that they are connecting to the skin right on your lash line. Now open your eye and if you see any gapping in between your lashes and the fake lashes, squeeze them between your fingers to mesh them together. Also, if your lower lashes stick to the upper lashes, you used a little too much glue, but just open your eyes as wide as you can to pry them a part. Now repeat all of this again with the other side. Whew! It seems like a lot of work, but when you have done it multiple times, it will seem like no big deal. Once you have the lashes on, you will want to blend the lash line with liner so that the strip isn’t so obvious. Apply as much liner as you are comfortable with right above and along the lash strip. Next curl the lashes, gently, with a lash curler and apply a thin coat of mascara. You won’t need a whole lot since the lashes are much for dramatic than regular lashes and don’t need a whole lot more emphasis. I hope this guide helps you and you can start wearing the lashes whenever you want!         
    
My Favorite Eyelash Brands
As for what brands and models I like to use, it depends on how I feel that day and what I’m wearing the lashes for. Going with something natural and cute is appropriate for an event such as a wedding or just to wear for the heck of it. Obviously the more glamorous you want to look, the longer and fuller the lashes are going to have to be. Also, you will want to consider your eye shape. For women with small eyes, something like Ardell’s 2010 will be suitable, or if you have larger, deep set eyes, you will want to use something like Ardell 120.  For something feminine and natural looking for a wedding, and for someone on a low budget, your local drugstore or Target is a great place to go for some great lashes. Ardell, Model 110 or 116 (price $4; ww.ardelllashes.com), are my favorites for creating this look. They are full, flirty, and natural looking and are not overbearing at all. Perfect for someone who doesn’t normally wear fake lashes. If you want to spend a little more dough for good quality lashes, Ja’maal Buster, Lash Guru to the Stars(price $12; www.JamaalBuster.com) has some very cute, long, lashes, while also offering those vampy, very fashionista, crazy lashes too. My favorite models are “Second Date Guaranteed” and “Daddy’s Little Girl.” Ja’maal has a pair of mink lashes that run for $125 but I would guess most people probably won’t give in to that splurge unless you’re crazy or crazy rich. Some other great brands that are on the pricier side are MAC (price $14; www.maccosmetics.com), Shu uemura, which can be bought at any Sephora store (price $20; www.Sephora.com) and Smoke and Mirrors Beauty, which Kim Kardashian and Carrie Underwood wear (price $13.50-21.50; www.smokeandmirrorsbeauty.com). There are soooo many styles and looks that I honestly can’t tell you what my favorites are out of these three brands. You can save the lashes for up to at least 3- 4 wears. So save that little plastic container they come in to store them for multiple times.   

Eyelash Extensions
Another alternative to fake eyelashes, and a service that I actually offer to my clients, are eyelash extensions.
This is a semi-permanent solution to women who want to have longer, fuller, more youthful lashes, but don’t want to go through the day-to-day regimen of putting on fake, glue-on lashes, and in some cases, depending on how glamorous you have them applied, you can even go without mascara too! No one will know they are fake which is awesome! They are literally just an extension of your real lashes. Eyelash extensions are not something that you can do yourself. A certified technician must apply them with your eyes taped closed and with special medical grade glue. The downside is that some spas and salons will offer this service anywhere from $200-400+. The upside is that I charge $125 for a full set!!! I’m just putting it out there….  It’s definitely worth it though to get them, and I’m not just saying that to boost business. They are truly awesome!   


Another upside is that they last up to 4 weeks depending on your lash cycle and the level of after care you provide. It is just like getting highlights in your hair in the sense that you have to keep doing it if you want to keep up the look. The procedure takes about 1 ½- 2 hours, but once you have them on, you will be addicted!!
I use a brand called JB Cosmetics LashOut! (www.lashoutpro.com). To rewind back to why I ripped all my lashes out and why you should definitely be reading this section of my blog…. I had eyelash extensions applied about 4 months ago by a certified technician/friend of mine. Instead of being smart and having her remove them with a special removal solution, I used regular makeup remover and pulled them off…along with my real eyelashes. Did it hurt? Hell yes! And I was stuck looking like a weirdo for a month until the lashes grew back. I wore fake eyelashes every single day and hated it! So heed my advice, and do not take eyelash extensions into your own hands. Always go to a professional when having them applied and removed!
                  
Big Lashes Without Being FakeIf all of this seems like way to much maintenance and money, but you still want to achieve a fabulous, big lash look, then I would tell you to invest in a really good eyelash curler, and grab some really great mascara. Don’t buy in to those mascaras that promise longer, full, lashes.
All I can tell you is, it’s not for real and a total joke. The only thing that works is Lattisse, which requires a prescription, and almost all of those other off the counter brands aren’t going to cut it. They might slow down the lash cycle so that it seems like your lashes are fuller, but they won’t do what they promise which is helping them to actually grow. A product that is alternative to Lattiss and costs about $85.00 @ Sephora is Talika Lipocils Eyelash Growth Stimulating Solution which I used when I ripped my eyelashes out.

Mascaras
One of my favorite mascaras can be found in Target or any drug store, and it’s honestly the best I’ve ever used. I’ve tried so many brands and high end mascaras, but always revert back to my good ‘ol reliable friends of Maybelline. Their newer lines, Volume Express Falsies and The Collassal Volume Express, are great for achieving length and volume! They both have a very black formula and the Falsies has a flexible wand for full application of those little tiny lashes that are hard to get to.

However, since I was 12 years old and was allowed to even wear makeup without getting yelled at, I’ve been using their [Maybelline] original Volume Express (with the curved wand) .                   
How to Apply Mascara
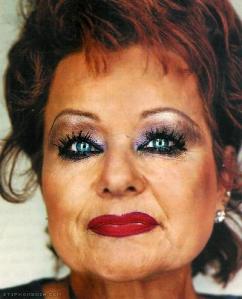
When applying mascara you will want to curl the lashes first, apply a coat of mascara, and then curl them again once the mascara dries. Place the wand at the base of the lash and wiggle it slightly to make sure each lash gets into the brush. Hold it there for 2 seconds and then sweep up. I like to apply the mascara to top of the lashes in addition to the traditional way of apply it under and up. Keep repeating these steps until you achieve the look you want. Careful not to do the lower lashes until the top ones are dry as this is going to create a mess on your lids (polka dots) when you look up to do the bottom lashes. Also beware of applying too much product as this will not only deflate the curled effect but also make you look like tarantulas are on your face or Tammy Faye, and that ain’t cute! LOL!!